Uploading & ordering photos
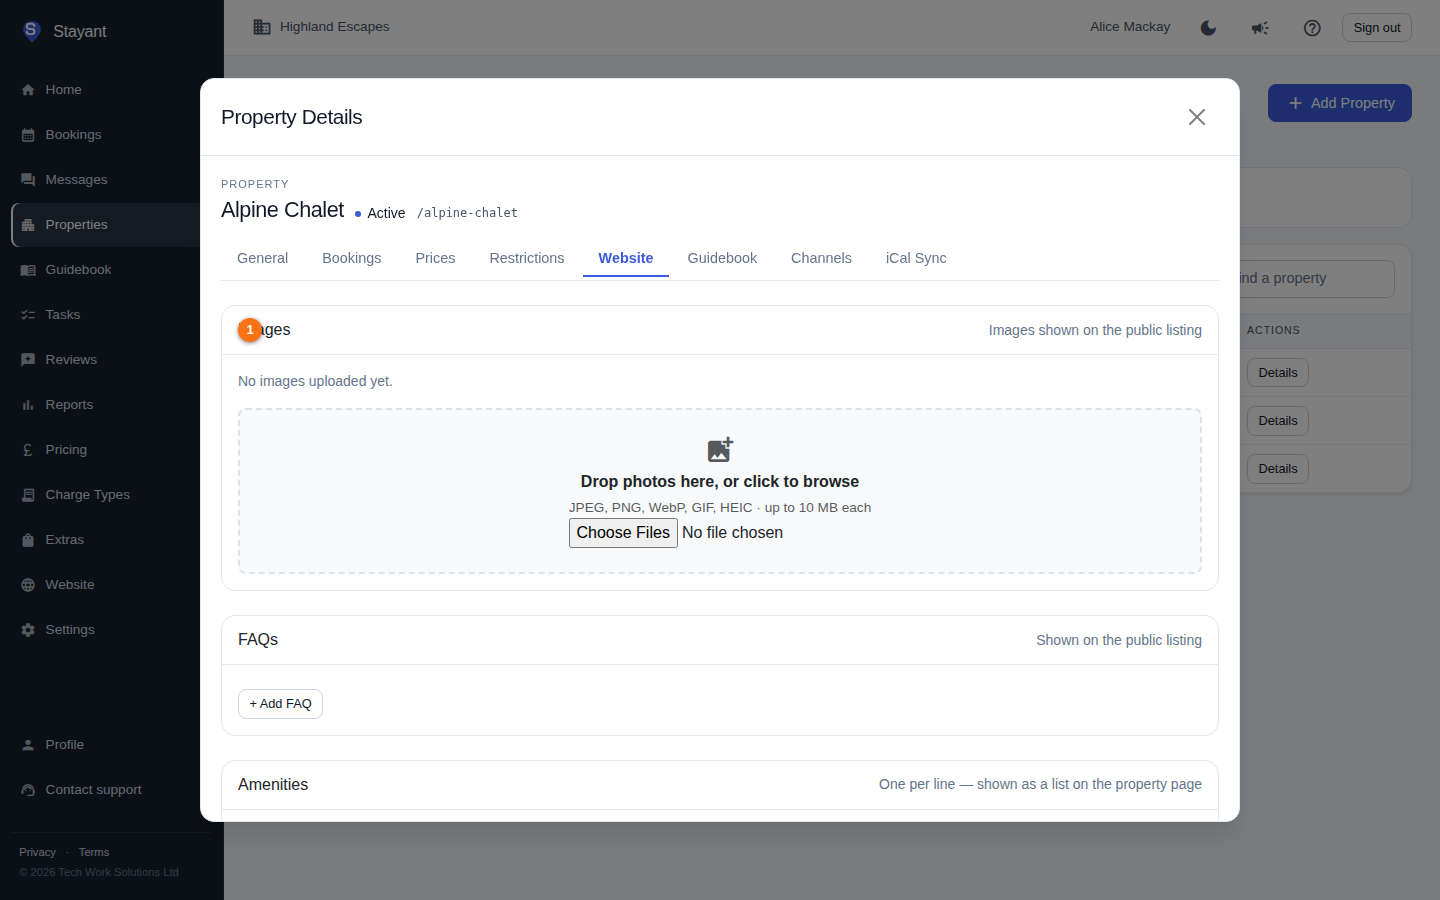
Property photos appear on the public listing. They are managed in the Images section of a property's Website tab.
- Open a property from the Properties list.
- Select the Website tab.
- The Images section (①) is at the top.
If any photos are already uploaded, each appears as a tile (②, if present) you can reorder, and a Set Hero button (③, if present) shows on every non-cover image.
Upload images
- Drag image files onto the upload drop zone (①) at the bottom of the Images section, or click it to pick files.
- Selected files are added to an upload queue and uploaded a few at a time.
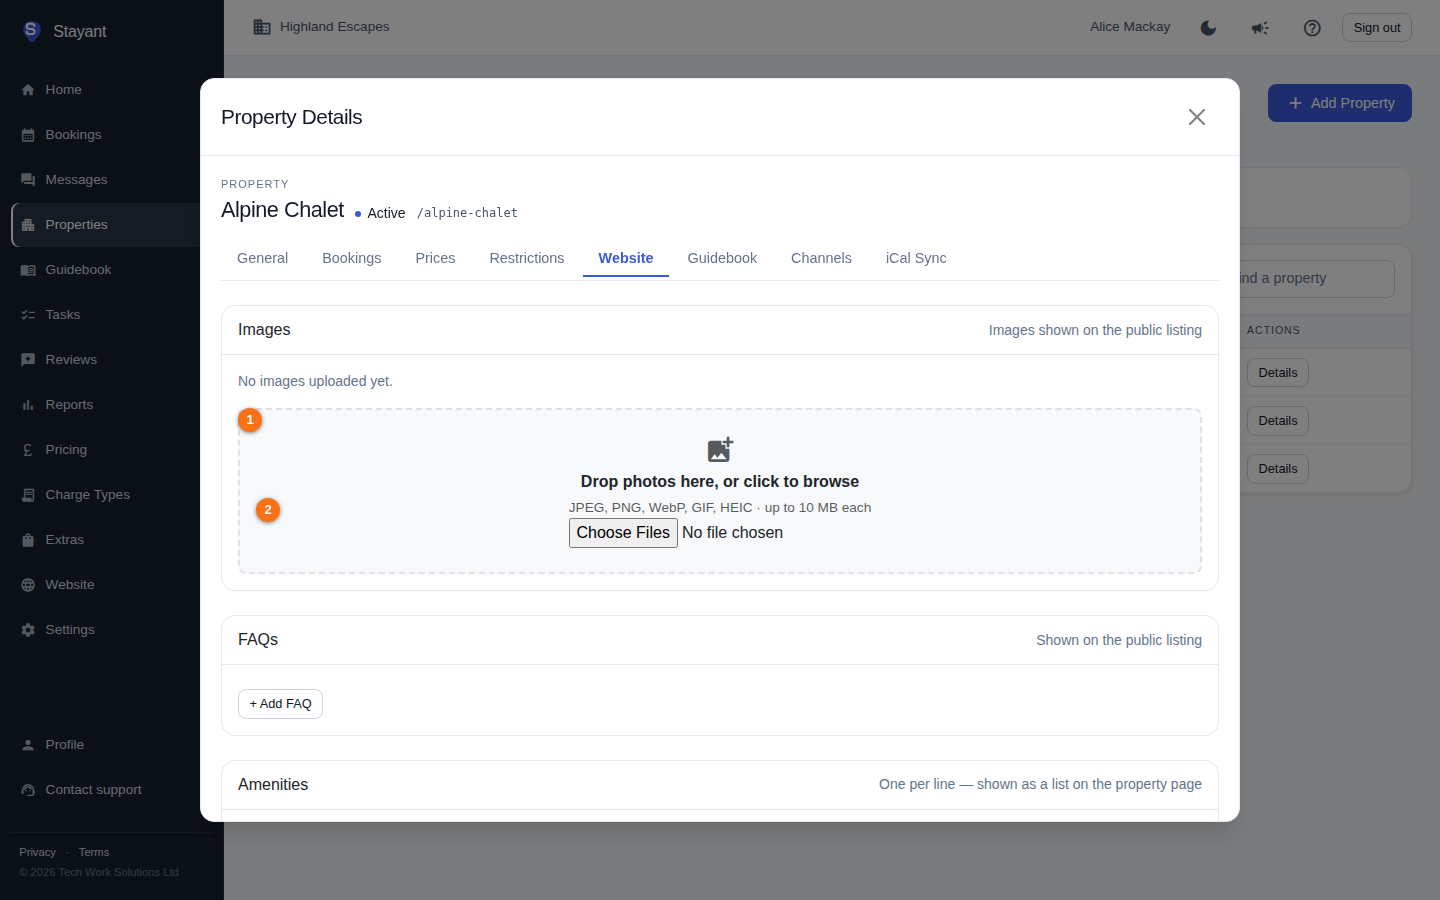
Limits and rules (②):
- Maximum 10 MB per file.
- Unsupported file types are rejected with a short summary of what was skipped.
- Only the first 50 files in a single batch are queued; extras are dropped.
Reorder images
Drag any image tile (use the drag handle in the top-left corner) to a new position in the grid. The new order saves automatically — rapid reorders are collapsed into a single save, so the last order you leave it in wins. If a save fails, the gallery refreshes to show the true saved order.
Set the hero (cover) image
The hero image is the main/cover photo for the listing.
- On any non-hero image, click Set Hero.
- That image is marked with a Hero badge and a highlighted border.
Only one image can be the hero at a time.
Add alt text
Alt text describes an image for screen readers and improves accessibility.
- Click Alt text on an image.
- Type a short description and click Save.
Delete an image
Click Delete on the image tile. It is removed immediately.
Common gotchas
- There is no separate "cover" control — the Hero image is the cover.
- Reordering is drag-and-drop only; there are no up/down buttons.