The Custom section block
The Custom section is for content that doesn't fit any other block, like a house rules note, a boot room, or an offer. You build it from simple parts: a small kicker line, a heading, formatted text, an optional photo and up to two buttons. There's no code to write.

Adding one
- In the page editor, click Add Block and choose Custom section.
- Fill in the Content panel:
- Kicker: an optional small line above the heading.
- Heading: you can make it a section heading (H2) or a sub-heading (H3).
- Text: basic formatting. Write paragraphs as
<p>…</p>, and use<strong>for bold,<em>for italic,<a href="…">for links and<ul><li>…</li></ul>for lists. Anything else is removed when the block is saved. - Photo: choose where it goes. The options are No photo, on the left, on the right, above the text or behind the text. Then upload a photo and describe it for screen readers.
- Buttons: up to two. A button only appears once it has both its text and a link.
- Text alignment and Width: narrow, standard or wide.
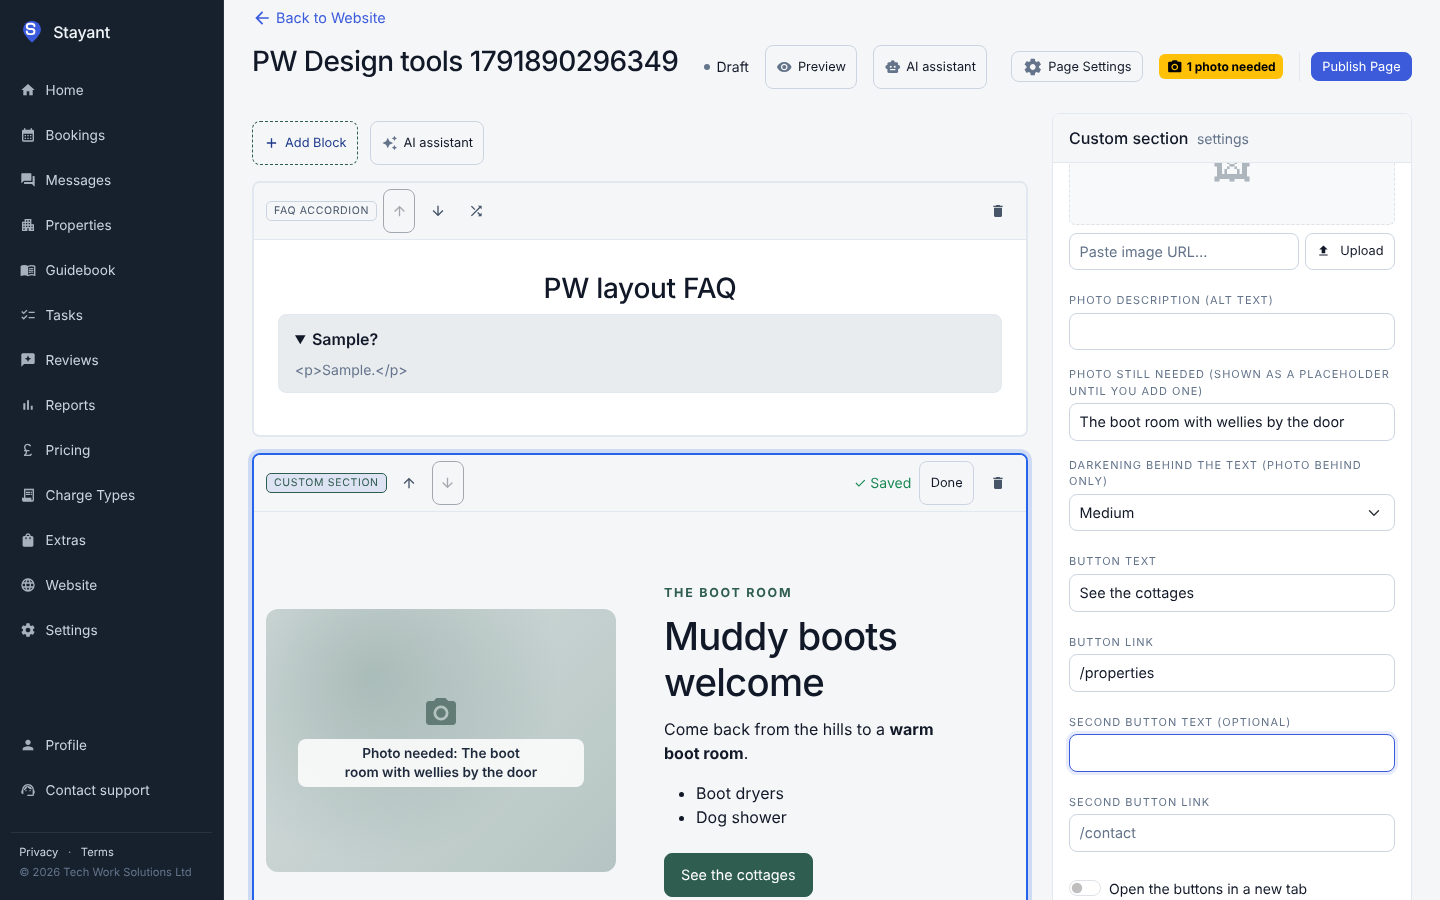
Photo behind the text
The photo fills the section and is darkened so the white text stays readable. Use Darkening behind the text to choose how much: Light, Medium or Strong. If your photo is bright, choose Strong.
No photo yet?
Fill in Photo still needed instead. A tinted placeholder shows where the photo will go, and the section counts towards the "photos needed" total until you add one. See Photo placeholders.
When to use another block
A dedicated block often looks better and is quicker to fill in:
- side-by-side photo and text with icons or stats: Image + Text;
- a call to action: CTA Banner;
- questions and answers: FAQ Accordion.