Adding your first property
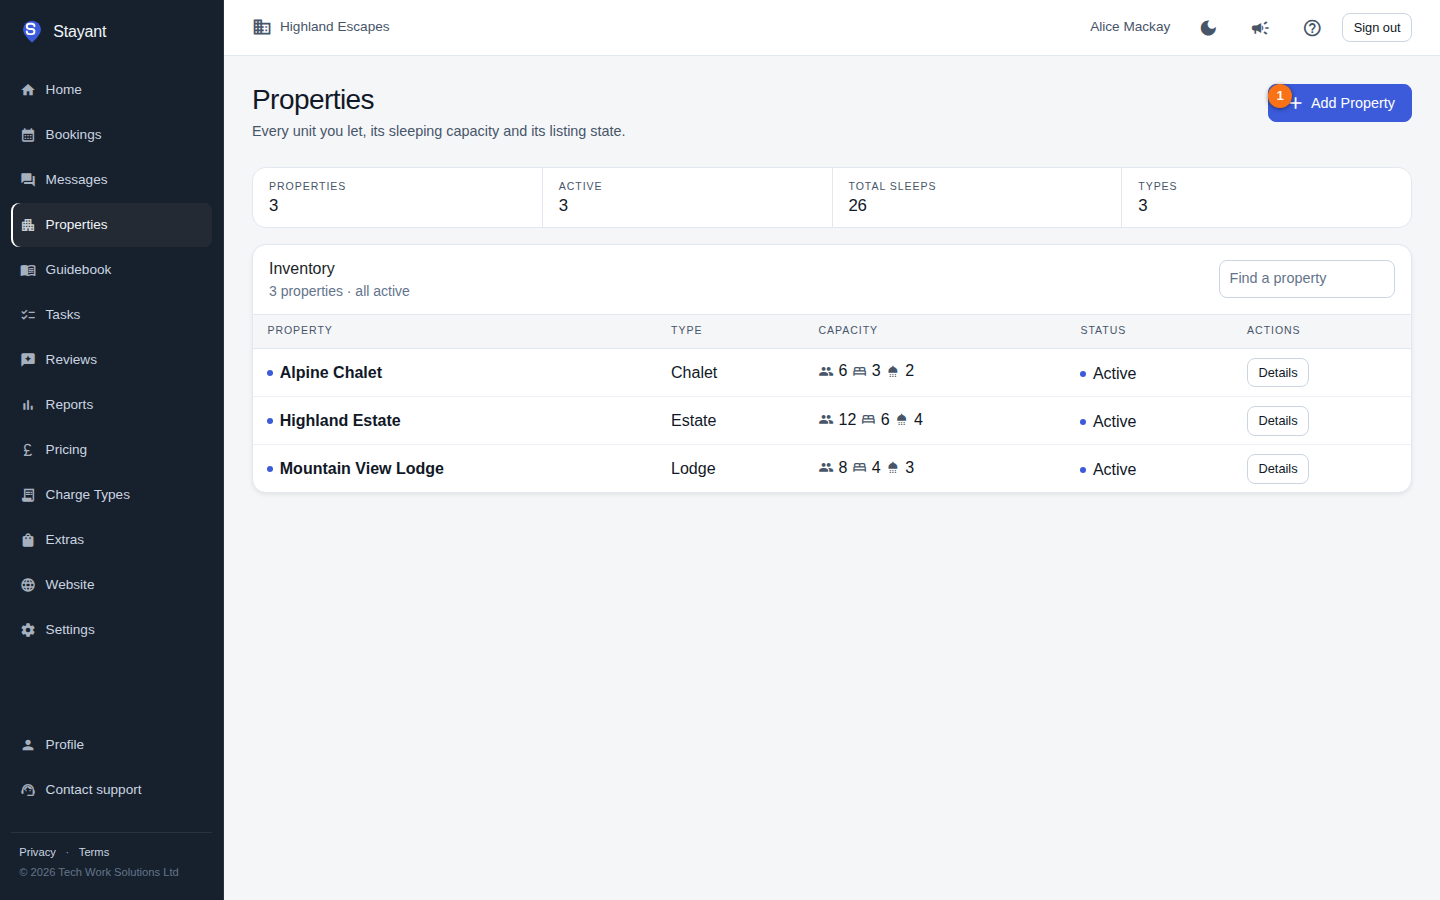
Before you can take bookings, you need at least one property in your account. Properties are created from a dialog on the Properties list page — there is no separate "new property" page.
Open the new-property dialog
- Go to Properties in the main navigation.
- Click Add Property (①, top right) — the Add Property dialog opens.
Fill in the form
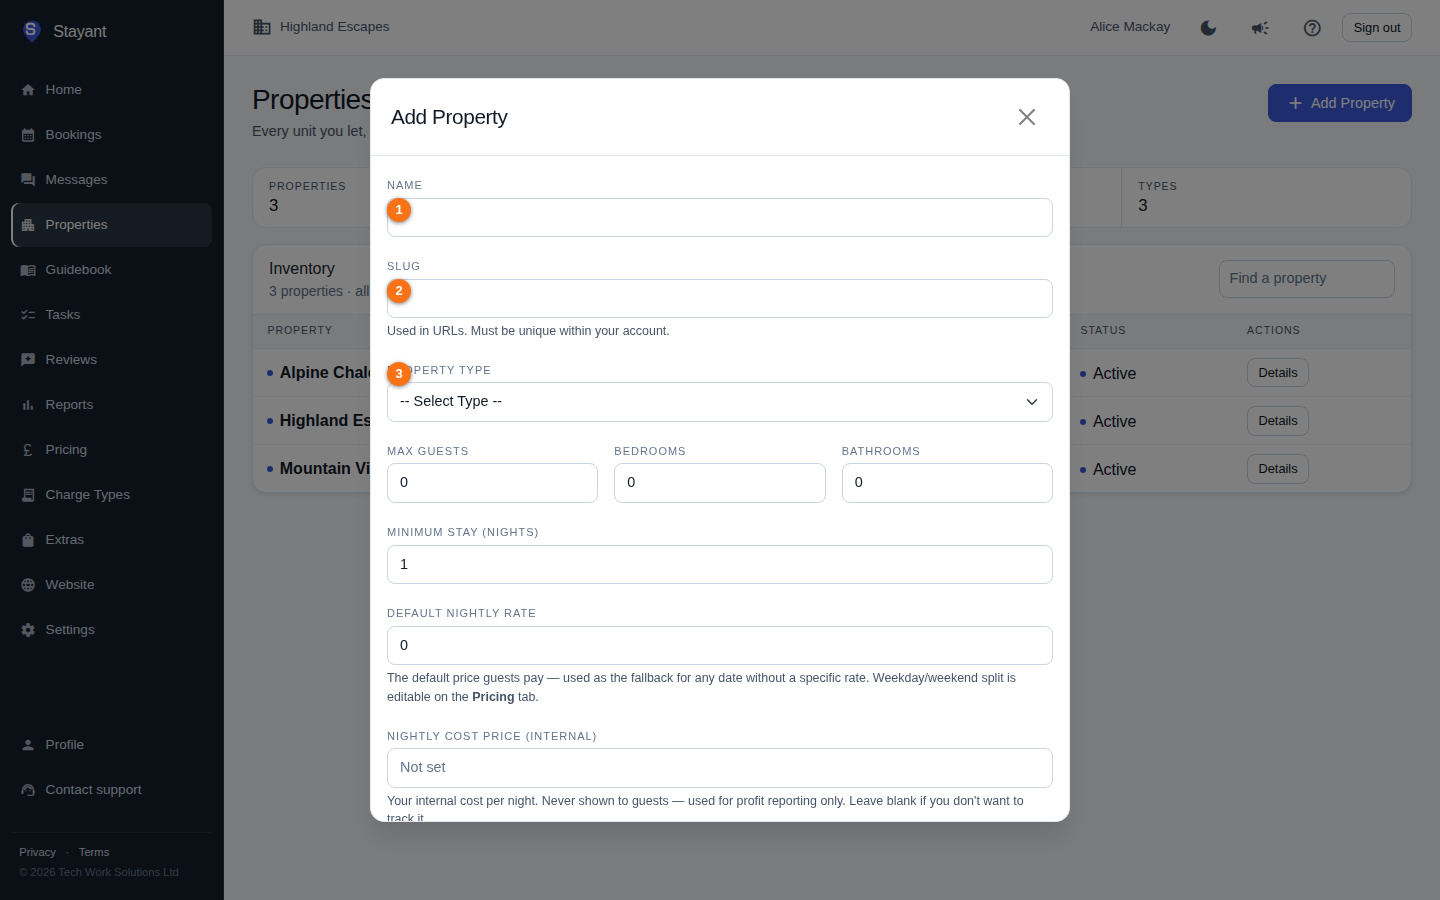
The dialog opens to the property form. The fields at the top identify the property:
- Name (①) — the property's display name.
- Slug (②) — used in URLs and must be unique within your account. It is generated automatically from the name as you type; edit it if you need a different value. Once you change it by hand, it stops auto-updating.
- Property Type (③) — Estate, Lodge, Chalet, Cottage, Villa, Apartment, or Other.
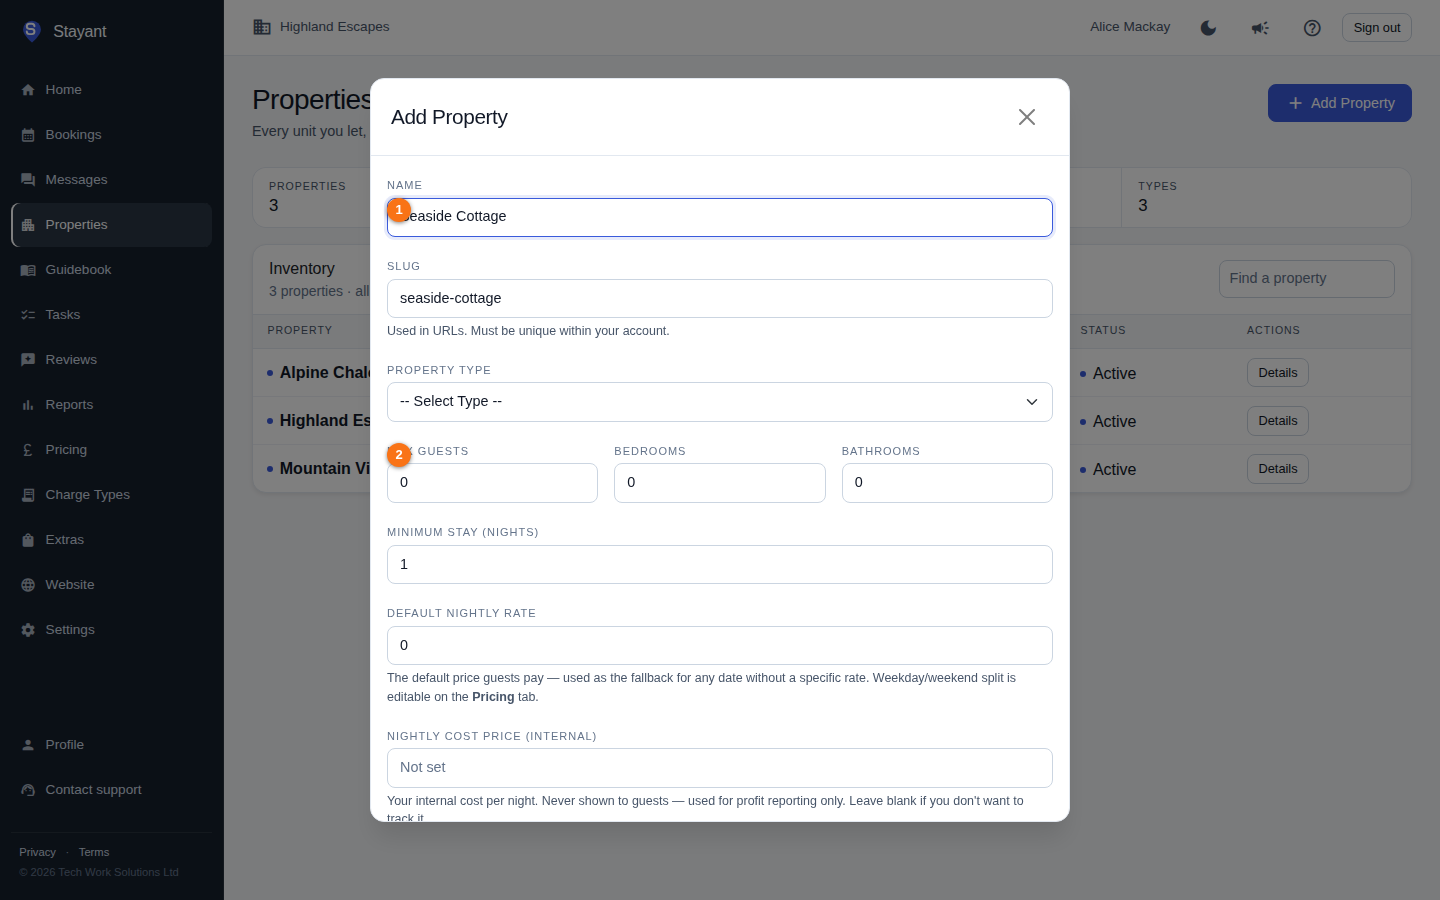
Then complete the rest of the form. With a name entered (①), fill in the remaining details:
- Max Guests, Bedrooms, Bathrooms (②) — the property's occupancy details.
- Minimum Stay (nights) — the default minimum number of nights (1–365).
- Default Nightly Rate — the default price guests pay: the fallback used for any date that has no specific rate. You can split this into weekday/weekend rates later on the Prices tab.
- Nightly Cost Price (internal) — your own cost per night. It is never shown to guests and is used only for profit reporting. Leave it blank if you don't want to track cost. See Nightly rate vs cost price.
- Check-in & check-out times — earliest / default / latest times for both check-in and check-out.
- Description — a rich-text description shown on the public site. Use headings, lists, and bold to keep it scannable.
- Exclude this property from company sales tax — tick if this property should not have your company's sales tax applied.
When the form is complete, click Save. The dialog closes and the new property appears in the list.
After you save
Open the property by clicking its row (or its Details button) in the list. On a phone each property is a compact row with an arrow; tap it. The property opens to a set of tabs:
- General — the core details you entered, plus check-in instructions and the property's time zone. New properties start on UK — London; if the property is abroad, click Edit and pick its zone under the check-in and check-out times. The times you set are read in that zone — it's what decides, for example, when a guest's door code and Wi-Fi appear in their guidebook (see Guidebooks).
- Rooms — only shown once the property has more than one active room (see Setting up rooms & units).
- Bookings, Prices, Restrictions, Website, Guidebook, Channels, and iCal Sync.
Photos, amenities, and FAQs are managed on the Website tab. Use the other tabs to set pricing, stay rules, and channel connections.
Common gotchas
- Slug clashes. If saving fails with a uniqueness error, change the slug to something not already used by another property.
- The Rooms tab is hidden at first. A new property has one room, so the Rooms tab does not appear until you add a second one. Single-room occupancy and pricing are edited on the General and Prices tabs.