Team members & roles
Everyone who can sign in to your Stayant account is a team member with a role that decides what they can do. You manage members under Settings → Team, where you'll find your current members, any pending invitations, and the controls to change roles or remove access.
If you just want to add someone, see Inviting teammates for the step-by-step invite flow. This article focuses on the roles themselves, property scope for staff, and ongoing management.
The roles
When you invite or edit a member you choose one of these roles:
- Owner — full access to everything, including team management and account settings. Owner appears as an option when editing an existing member's role.
- Admin — broad access to manage properties, bookings, settings, and the team.
- Manager — day-to-day management access across properties.
- Staff — limited access, scoped to specific properties (see Property scope below).
The Invite Member dialog offers Admin, Manager, and Staff. The Owner role is only selectable from the Edit Role dialog on an existing member, not when sending a new invitation.
The app enforces what each role can do; this list describes the intent. If you're unsure which role someone needs, start with the least access (Staff) and raise it later — you can change a role at any time.
Reading the members table
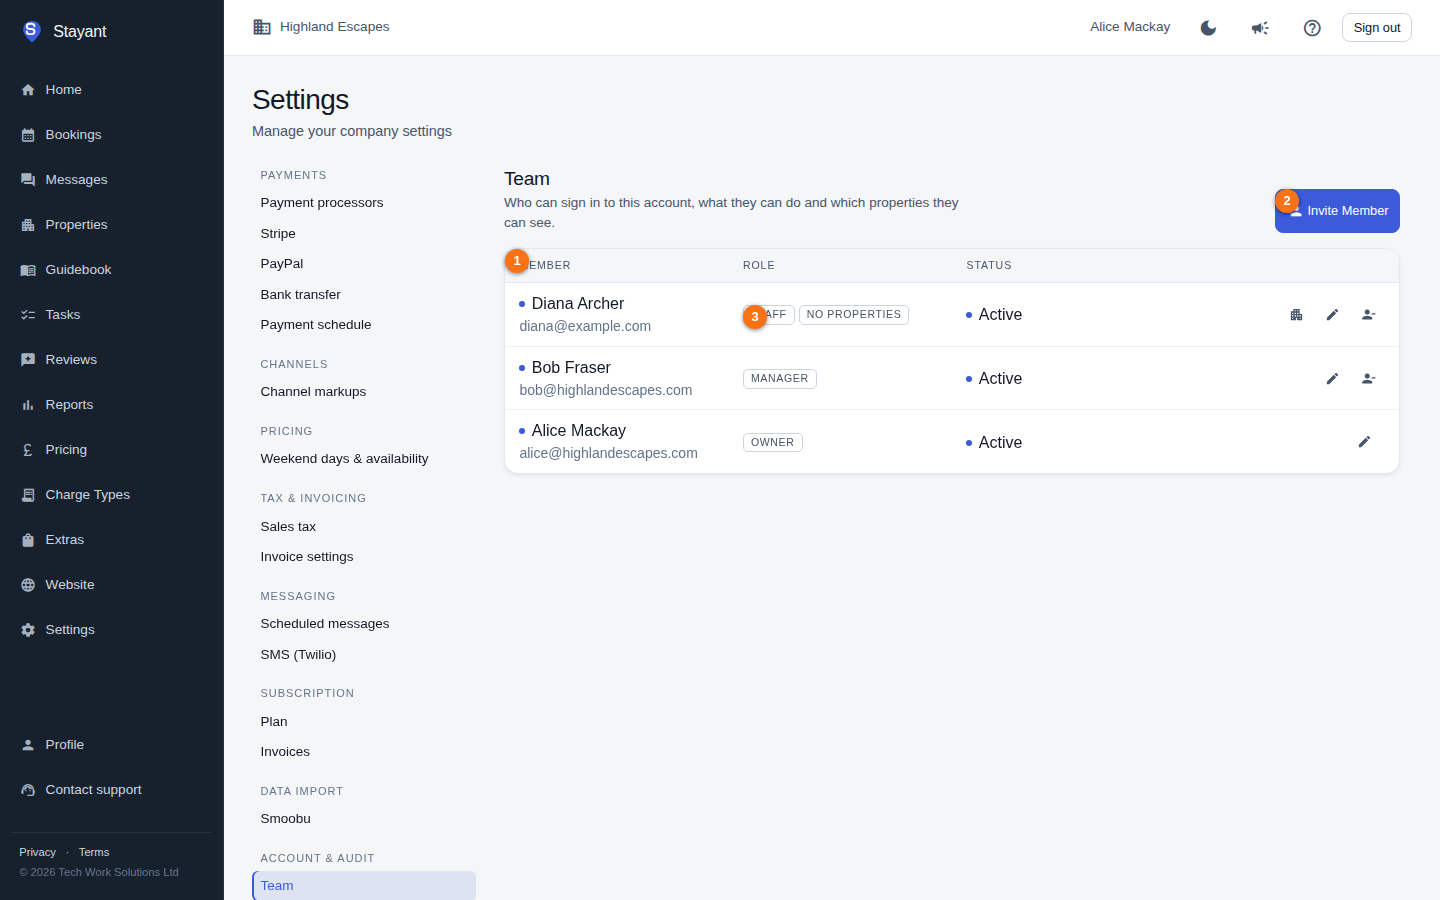
The members table (①) lists everyone on your team. Invite Member (②, top right) opens the invite dialog.
Each member row shows:
- Member — their name and email, with a status dot (and an Inactive label on small screens for deactivated members).
- Role — the role badge (③). For Staff members, an extra badge shows their property scope (for example "3 of 12 properties", or "no properties").
- Status — Active or Inactive.
- Actions — buttons to edit the role, manage property scope (Staff only), or remove the member.
Changing a member's role
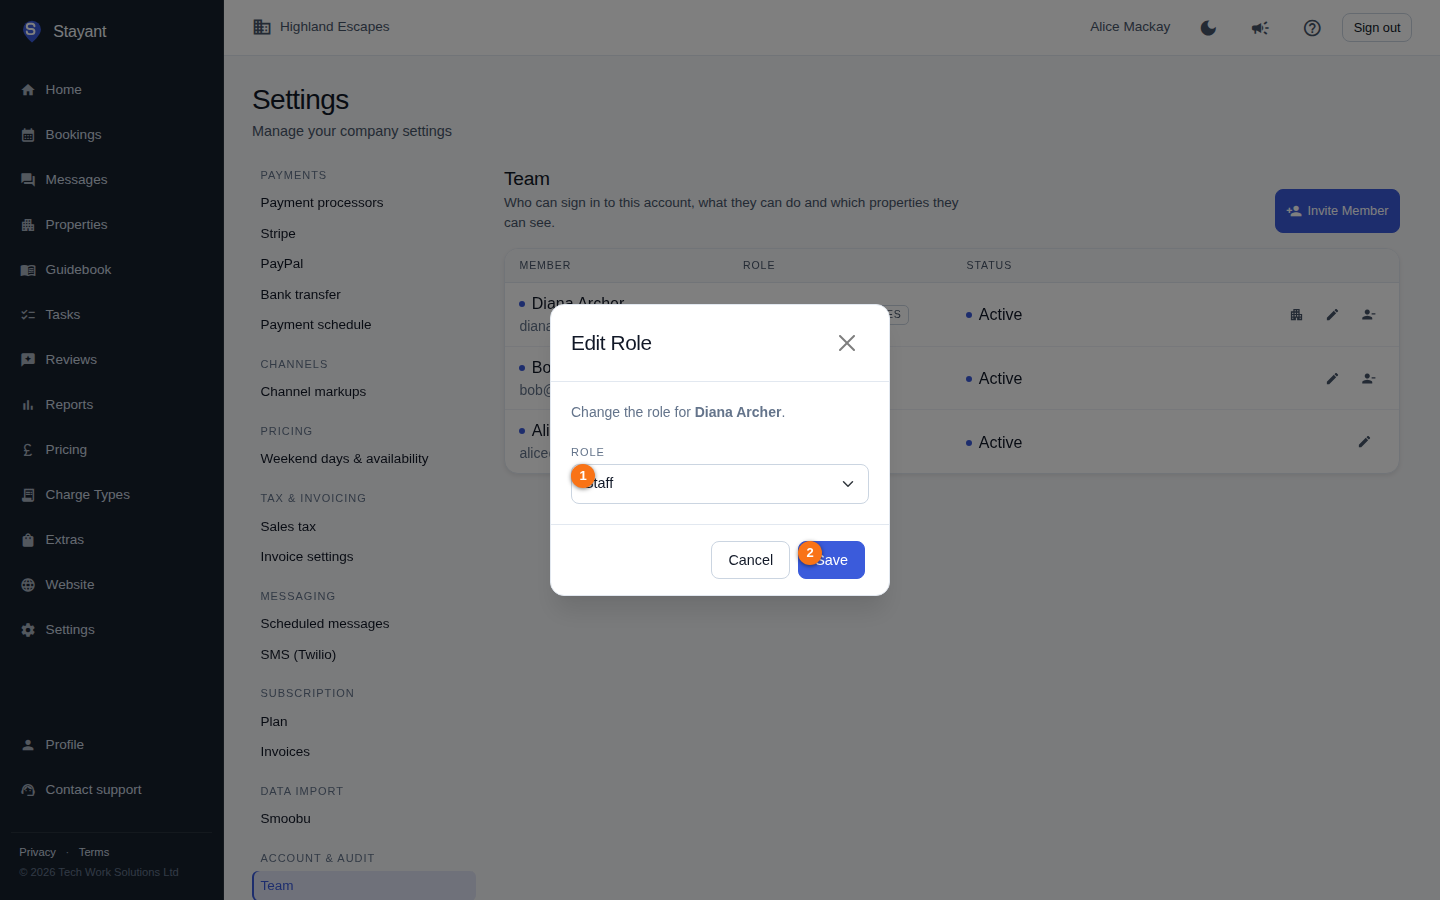
- In the Team members table, click the edit (pencil) button on the member's row.
- In the Edit Role dialog, pick the new role from the dropdown (①).
- Click Save (②).
The change takes effect immediately. Every account must keep at least one active Owner, so you can't change the role of the last active Owner.
Removing a member
- Click the remove (person-remove) button on the member's row.
- Confirm in the Remove Member dialog.
Removing a member deactivates their access — they show as Inactive rather than disappearing entirely. You cannot remove yourself: the remove button is hidden on your own row (and on members who are already inactive). You also can't remove the last active Owner.
Property scope for Staff
Staff members only see tasks for the properties you assign to them. Use this to keep on-site or per-building staff focused on just their properties' work.
- On a Staff member's row, click the property scope (apartment) button. This button only appears for active Staff members.
- In the Property scope dialog, tick the properties this member should see.
- Use Select all or Clear to set every property at once.
- The header shows how many are selected (for example "3 selected of 12").
- Click Save scope.
An empty selection means the Staff member sees no tasks — a handy way to temporarily suspend their access without changing their role. The scope controls what appears in their Tasks list.
If the property list can't be loaded, the dialog shows a warning with a Retry link, and scope can't be changed until the list loads.
Pending invitations
Invitations you've sent appear in the Invitations section below the members table, showing the email, role, status (Pending, Accepted, or Cancelled), and an expiry date.
To withdraw an invitation that hasn't been accepted yet, click the delete button on its row and confirm. See Inviting teammates for how to send a new one.